Background
I have been developing Cloudpress for a number of years now and have built up quite a collection of EF Core Migrations. A migrations directory with 200 migrations triggers my OCD, so I wanted to squash all the existing migrations into a single file.
I had a look around on the internet and came across various blog posts from other people on how they solved this issue for themselves. There are various approaches that are more suitable for certain scenarios but, in the end, none of them really suited what I wanted to do.
In this blog post, I will discuss my requirements and how I went about doing it. This may or may not suit your own requirements so, at the end of this blog post, I will list other blog posts you can look at to see how others approached it.
My requirements
Before I get into the specifics, let’s first look at my requirements. These will probably dictate whether my approach will be suitable to your own project or not.
-
Must work on new and existing environments. Cloudpress has a live production environment and I have an existing development environment, so the approach must work on existing environments without breaking anything. However, if I bring on a new developer or add a new environment, I must also be able to create the database from scratch.
-
Squash all migrations down to a single migration. At the end of this, I wanted to end up with a single migration. Some of the other approaches did not quite do this, as they needed to consider teammates and other deployment environments (see point 4 below).
-
Recreate base migration from scratch. Over the years my schema changed a lot and tables, columns, and stored procedures I previously used are no longer in use and have been dropped from the database. Some of the approaches I saw simply combined all existing migrations into a single migration.
I did not want these old tables and stored procedures hanging around in my migrations. Also, my database schema evolved, I wrote migration scripts that would update the data itself to adapt to schema changes.
I wanted something that starts from scratch and will only create the current schema when the new migration is applied to a new database.
-
No need to consider other people. Many of the other approaches are overly complicated as they are working in team environments. They needed to consider that there may be work in other feature branches or pull requests that are in development and needed to take this into account. They also needed to consider whether all the latest migrations are deployed to all other environments.
I am working as the solo developer on Cloudpress, so I did not have this issue. I knew that there were no other branches in development and that all the environments (production, test, and development) had the latests migrations applied.
An overview of my approach
At a high level, my approach involves the following steps:
- Create a new migration named, for example
SquashedMigrations - Apply this migration to all environments - that means your testing, production and development environments.
- Delete the entire migrations folder
- Create new migration with same name (e.g.
SquashedMigrations) and timestamp - Adjust schema to ensure database structures are in sync
- Success!
Please be sure to check the Additional notes section later in this blog post to see how you can use Git branches for an additional safety net, as well as how you can use this process in an environment with multiple developers.
1. Create new migration
I mentioned before that I want this approach to work on existing as well as new environments. In order to do this, we need to “trick” the existing environments into believing that the squashed migration has already been applied.
This is a two-step process, the first of which is to create a new empty migration named SquashedMigrations1
dotnet ef migrations add SquashedMigrations1
2. Apply migration to all environments
The second step to trick the existing environments into believing the squash migration is already applied, is to - you guessed it - actually apply this migration. However, since this migration will, at this stage, be an empty migration, it will not actually make any database changes.
For this step, you need to run the dotnet ef database update command on all your environments.
3. Delete migrations directory
Now we want to start off with a clean slate by getting rid of any existing migrations. To do this, delete the Migrations directory from your EF Core project.
4. Create new migration with same name (and timestamp) as before
Next, we want to create a new migration with exactly the same name as before, i.e. SquashedMigrations1.
dotnet ef migrations add SquashedMigrations1This migration will have the same name as before but will have a different time stamp. This is a problem since the different time stamp will result in EF Core believing it is a new migration and will try and apply it again if we run dotnet ef database update.
To fix this, update the filename(s) and [Migration()] attribute to have the exact same timestamp and name as the one we created in step 1.

At this point we can apply the EF Core migrations again by running dotnet ef database update. We should get a message stating that no migrations were applied and that the database is up to date. This is the result we are looking for as EF Core believes this migration was already applied and will not try and apply it again on our existing environments.

5. Adjust schema as needed
At this point, we’re happy that the squashed migration won’t affect databases in existing environments. Now, we need to make sure that the database created in new environments will be the same as the database in existing environments. We can do this locally by running the dotnet ef database update command and specify a different connection string than the one we use for our existing database.
dotnet ef database update --connection "Server=(localdb)\\mssqllocaldb;Database=Cloudpress_New;Trusted_Connection=True;MultipleActiveResultSets=true"This will create a new database named Cloudpress_New from the squashed migrations. We can then compare the schema of the new database (created from the squashed migration) with the schema of the existing database (created with the previous migrations).
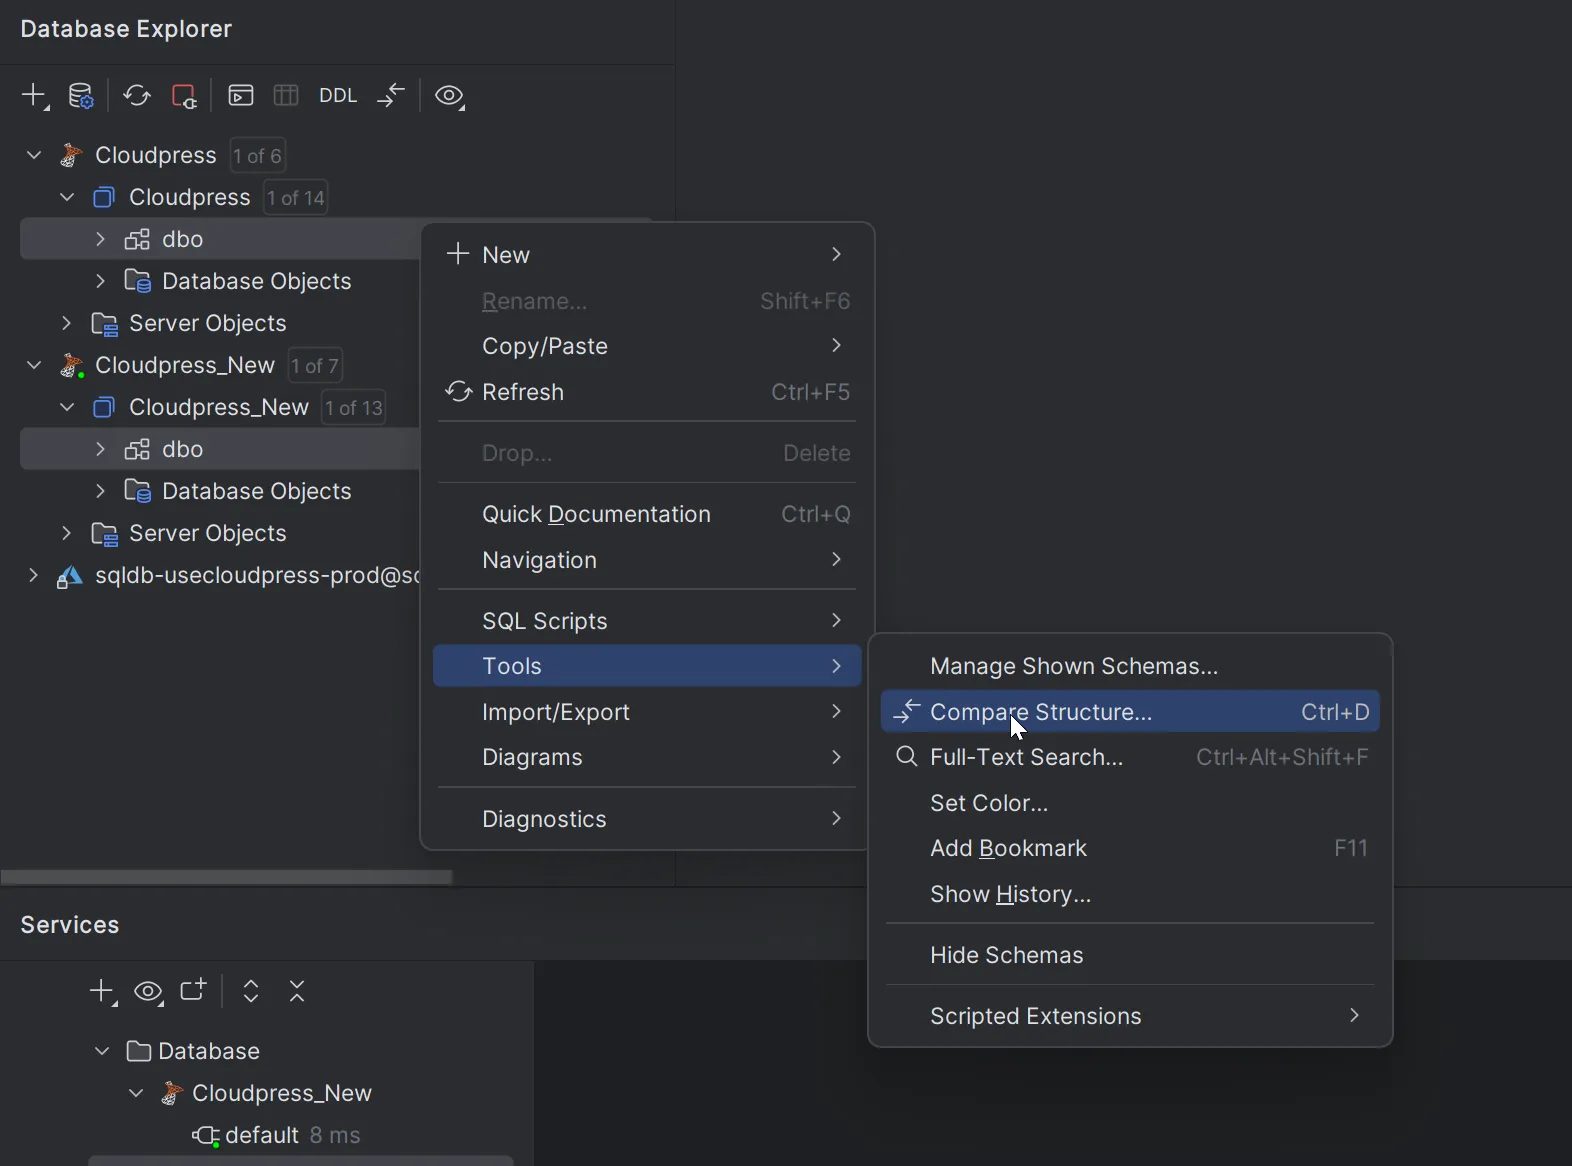
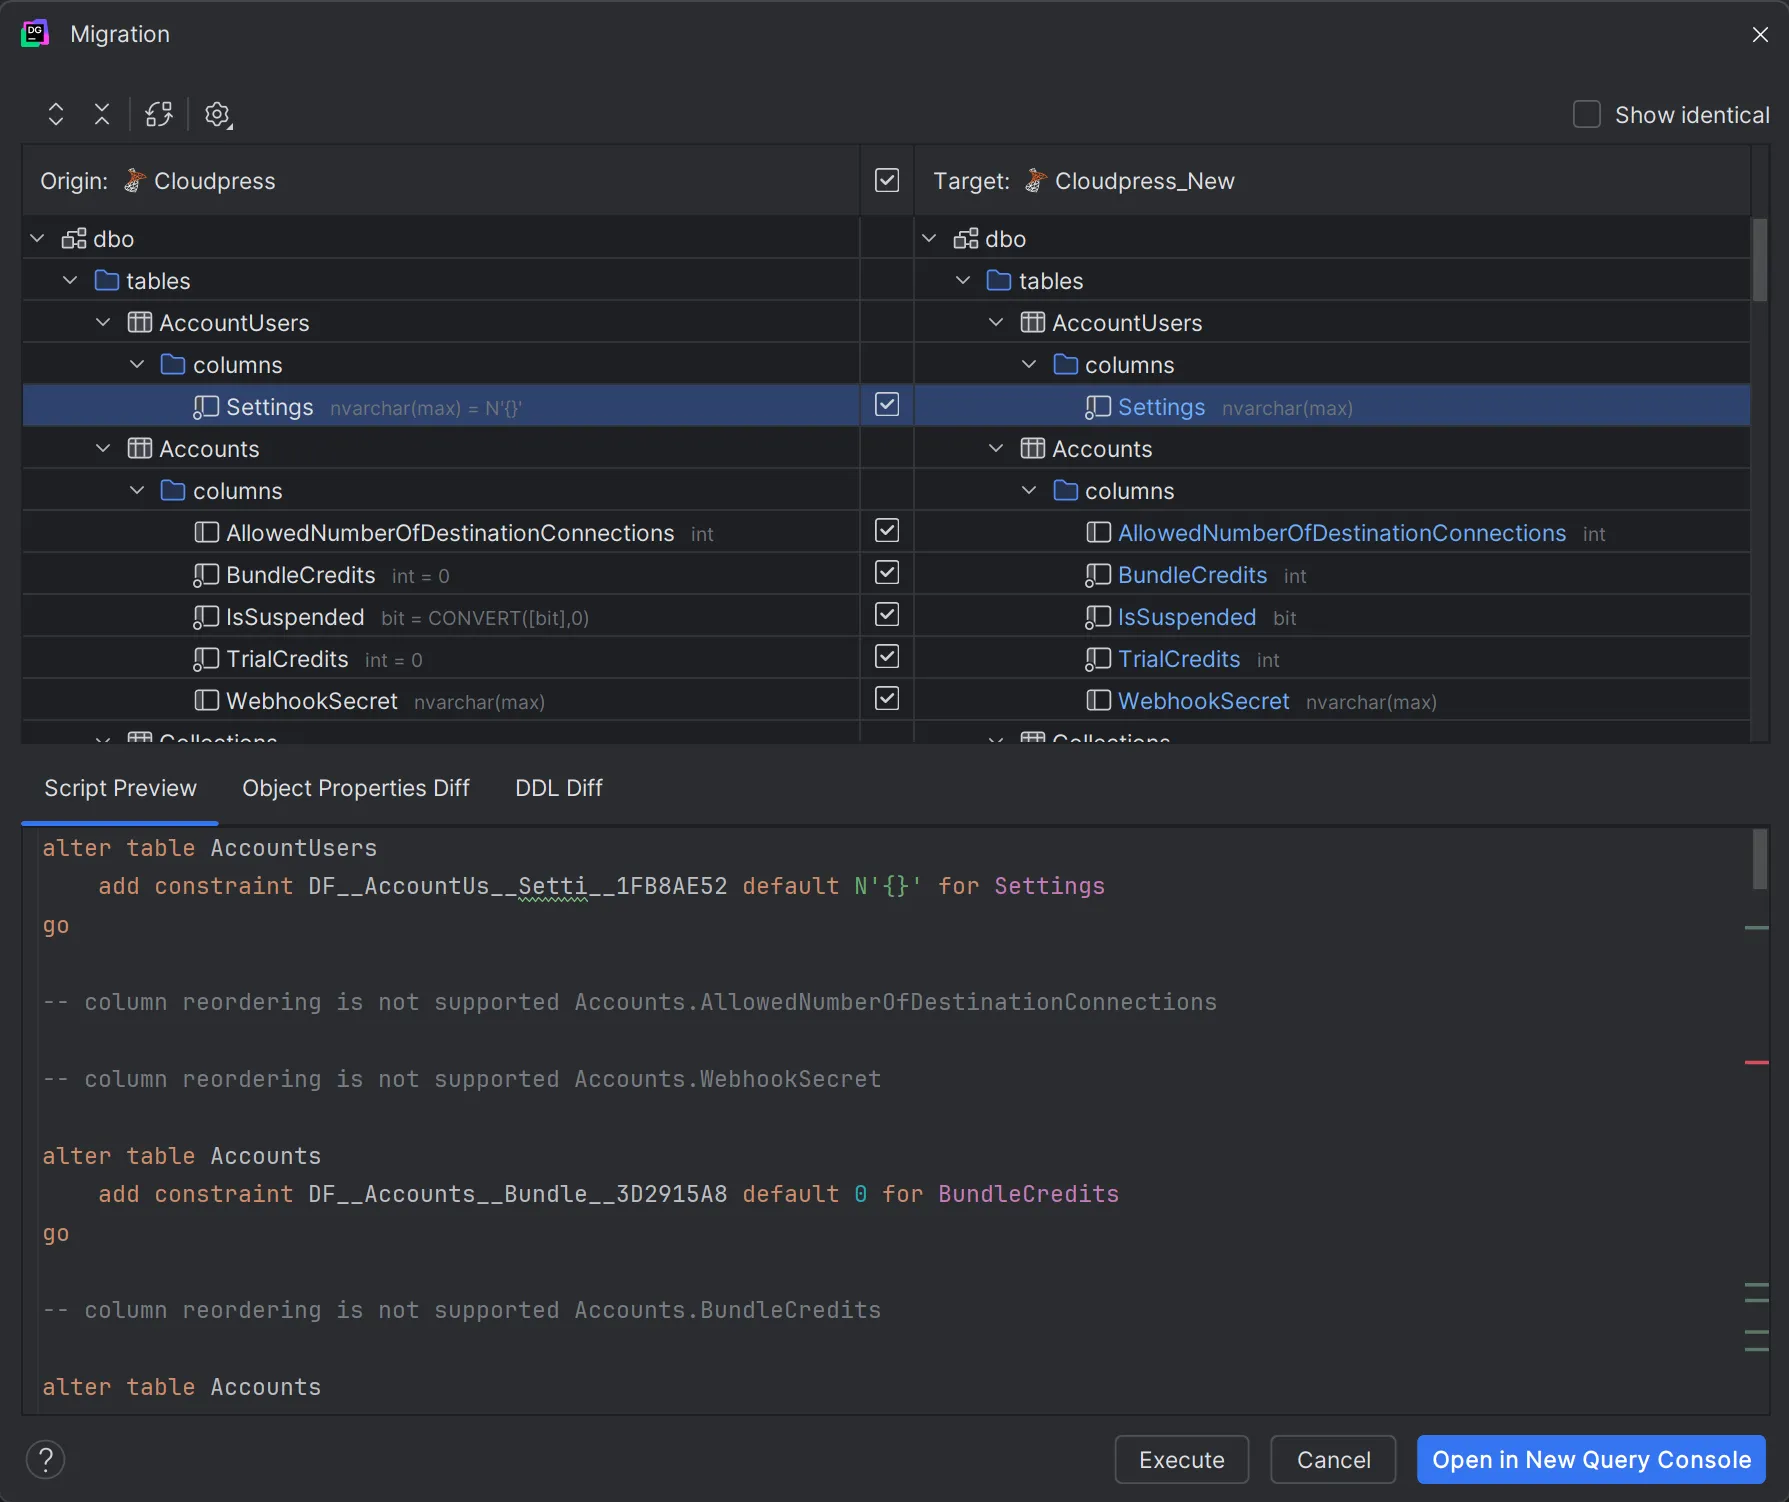
Depending on your database engine, there may be various tools that allow you to do this. Personally, I used DataGrip. Inside DataGrip, I created a second connection to the new database. Then, I selected the two schemas and selected the “Compare Structure…” menu item.

In my case, I could classify the differences primarily in two categories. The first set of differences were related to column defaults. The reason for this was because many of the columns in my database have had their NULL attribute altered over the course of development.
In cases where a column that previously allowed NULL values were changed to NOT NULL, I added a default value to supply a default value for existing rows in the database. I went through all of these one by one and decided they were inconsequential.

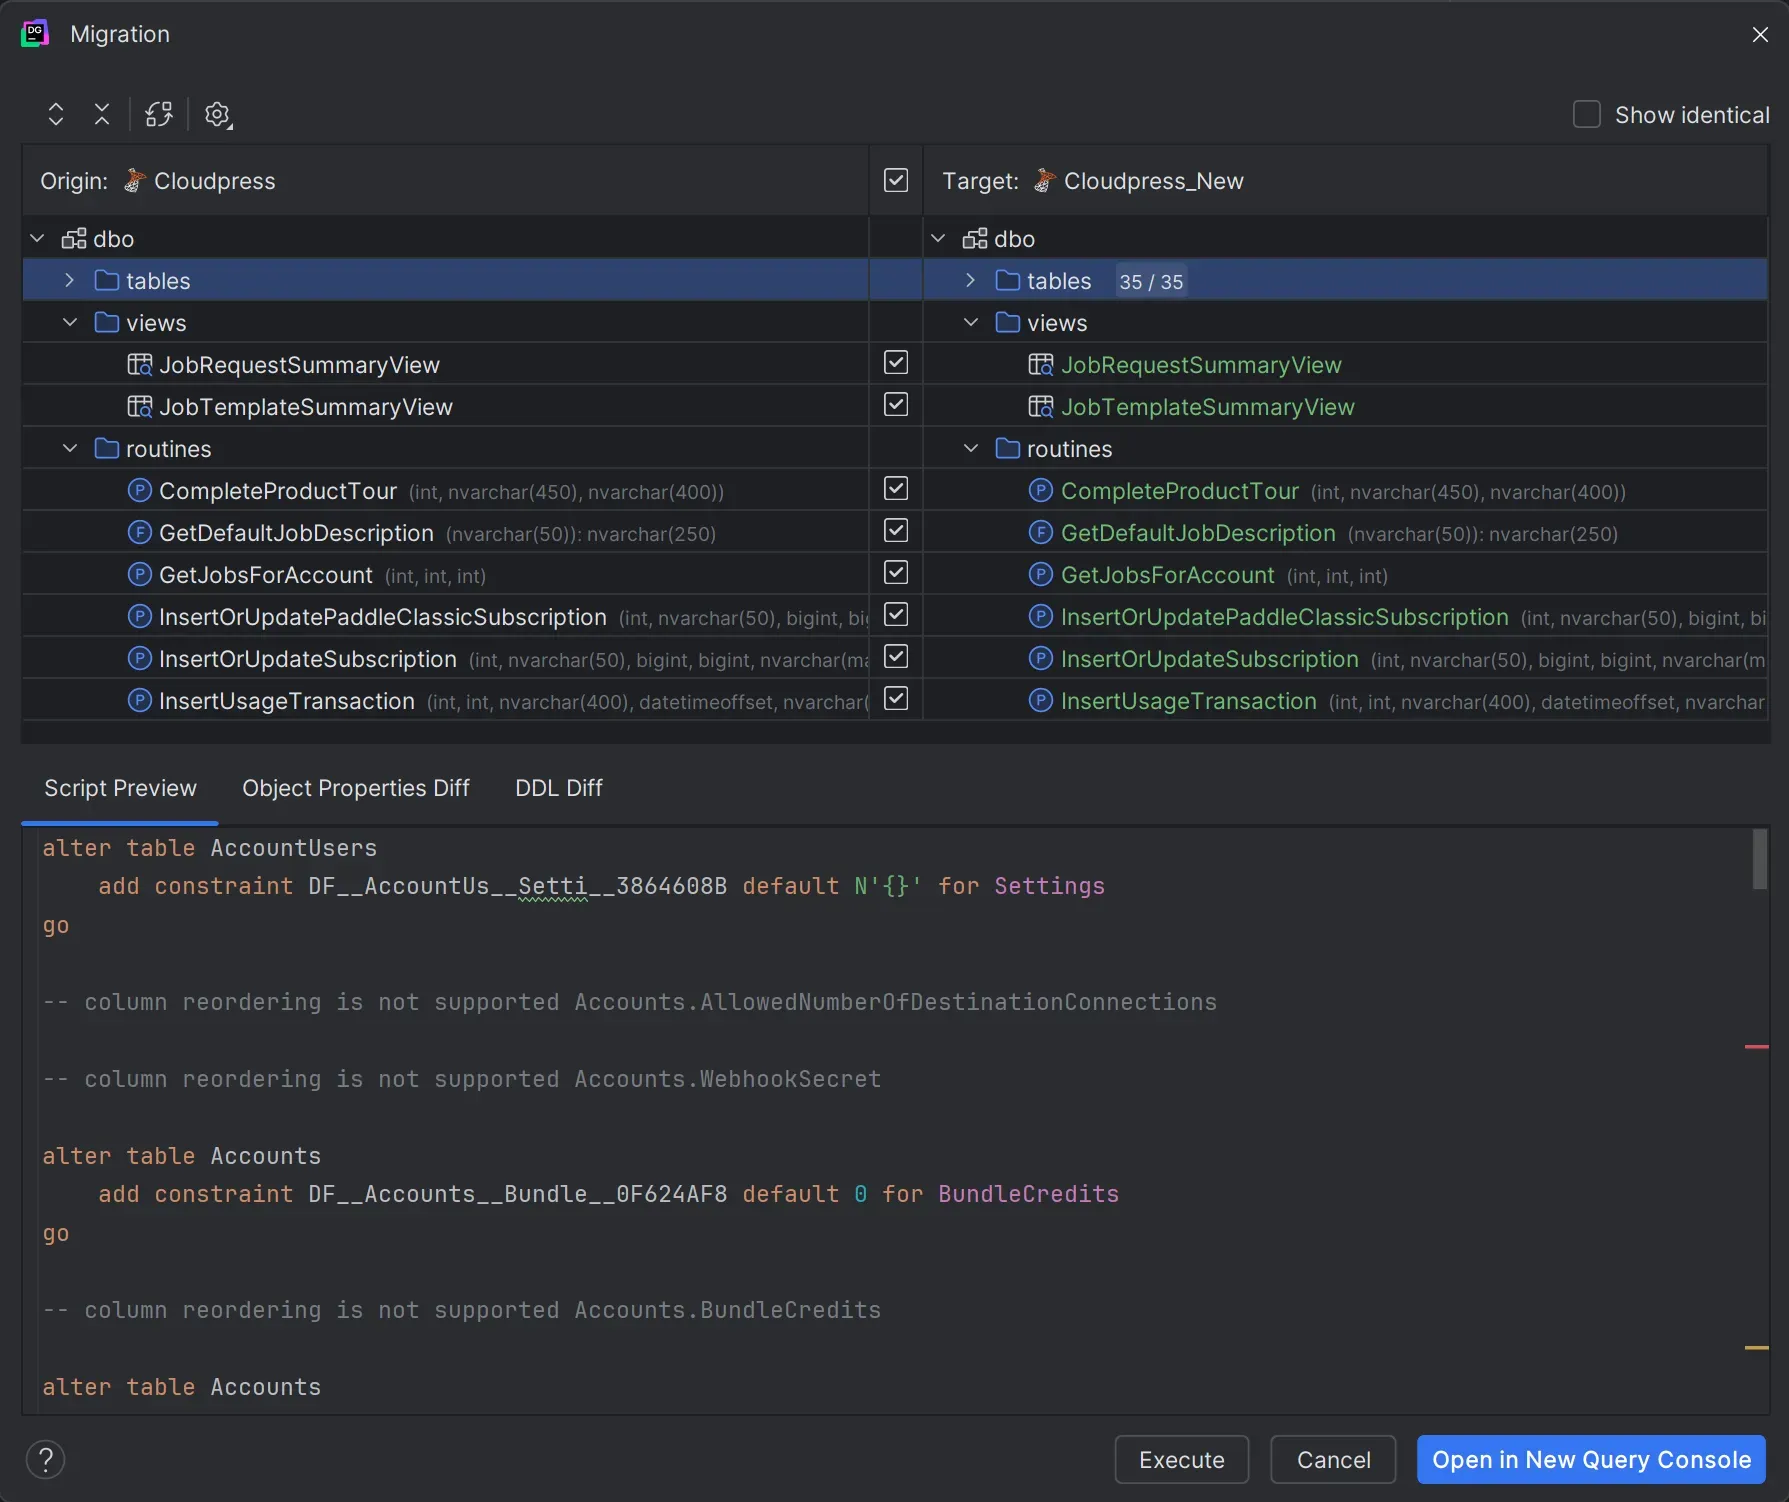
The second category was differences were related to my views, stored procedures, and database functions.

Once again I worked through these one by one. It turned out the differences were all related to slight differences in whitespace. I am not sure why it ended up like this, but those changes were once again inconsequential, so I ignored them.
Overall, I had good fortune and ended up with two database schemas that were, for all intents and purposes, the same. In your case, you may not be so lucky, and you may need to iterate through the differences and make changes.
Those changes may require you to either change your EF Core model, or make changes to the migration. For example, there may be a difference between the NULL attribute of a column in the two databases. You can fix this either by calling IsRequired() on the property in your model, or altering the migration directly.
I would suggest you always lean towards making the changes to the EF Core model as this will give you the most reproducible result in the future. This will however, mean that you will need to remove the migration entirely (by running dotnet ef migrations remove) and then recreating it (following the approach in step 4 above).
This will also mean that you will need to also add back the SQL scripts for creating things like views, stored procedures, functions, and other things that you create outside the EF Core model.
Continue iterating through this process until you end up with database schemas that are the same - or where the differences are inconsequential things like in my case.
6. Success!
At this point, you will hopefully end up with a working database for new environments that has the same schema as the ones in existing environments. You can commit all your changes and have those updates deployed to all your environments.
In the section below, I added additional notes on how you can use Git branches as a safety net, as well as how you can use this approach in teams with multiple developers.
Additional notes
Add a safety net using Git branches
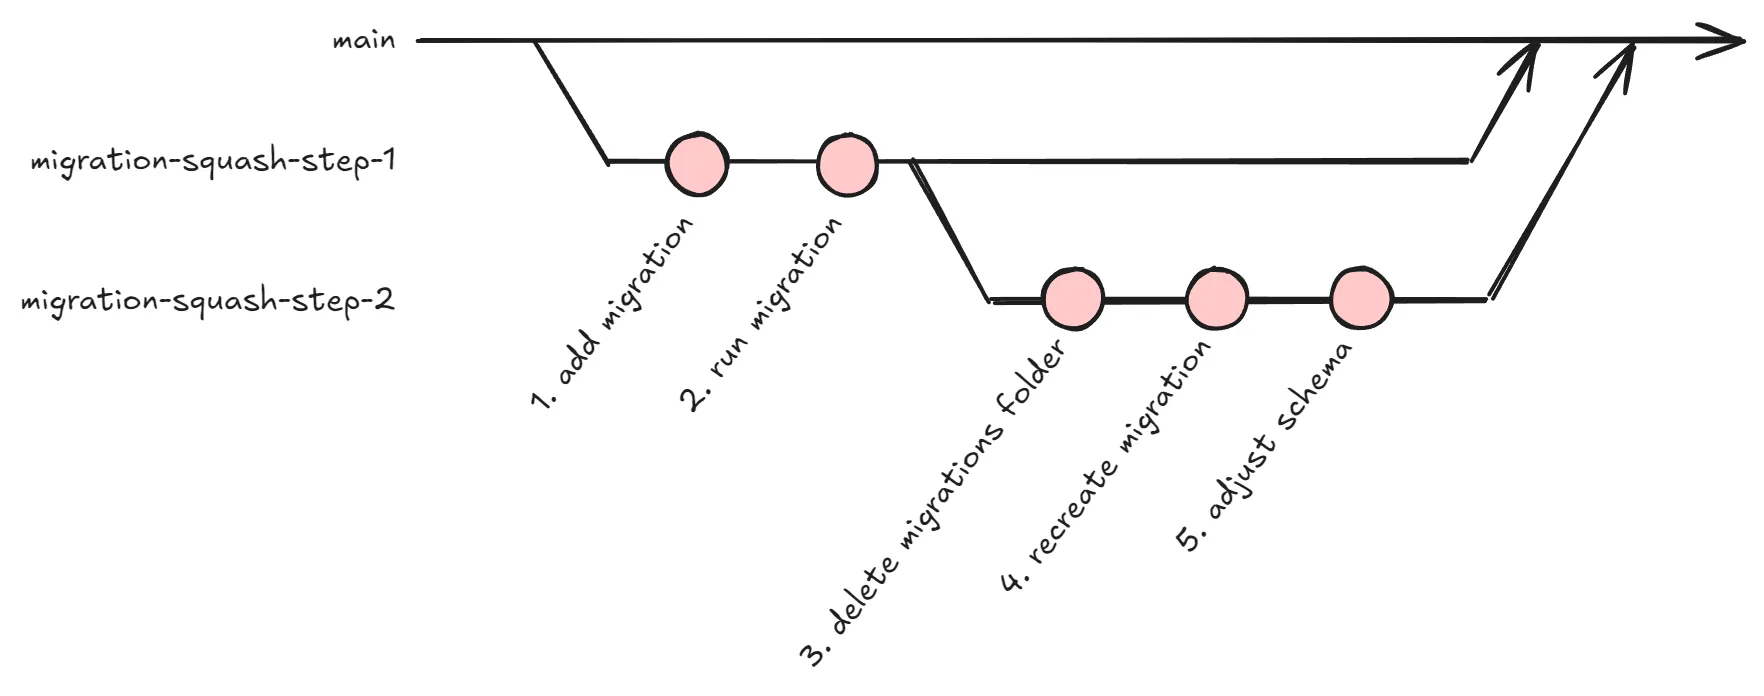
When I did this, I considered all the different steps and was pretty sure that it would work, but I still want to put some sort of safety net in place. What I did was to use different Git branches to group some of the steps together.

I created a branch named migration-squash-step-1 branching from main and applied steps 1 and 2 from above to this branch. I then created a second branch named migration-squash-step-2 branching from migration-squash-step-1. To this branch, I applied steps 3-5 from above.
Once this was done, on a second development machine, I checked out the branch migration-squash-step-1 and ran dotnet ef database update. I checked to ensure the new migration was applied to the database.
Then, I checked out the branch named migration-squash-step-2 and once again ran dotnet ef database update. This time, I made sure I got the message stating that no migrations was applied, since the migration tool believed this migration was already applied. At this point, I was sure that I was not going to mess up any existing environments.
I also did a final check by running dotnet ef database drop and then dotnet ef database update on this second development machine to ensure that a correct new database will be created on a clean environment.
Once this was done, I merged the migration-squash-step-1 branch into my main branch and ensure it was deployed to my testing and production environment. Once that was done, I merged migration-squash-step-2 into main and, once again, ensured it was deployed to all the environments.
Working with other developers
One of the things I mentioned before is that I am working as a solo developer on Cloudpress, so I did not have to take any other developers into account. That does not mean that this approach will not work if you are in an environment with other developers. You just need to plan things a little bit.
First off ensure that, once you start with this process, no other developers will be adding new database migrations. Then, work through your process and ensure that everything works and all the changes are deployed to all your testing and production environments.
At this point, other developers will need to get on the same page. If they check out the main branch and run a dotnet ef database update they will run into problems. EF Core will see that the SquashedMigrations migration has not been applied yet and will try and apply it to their database. Since this migration will now attempt to recreate the database schema for scratch, they will get all sorts of errors.
The other developers on your team have two options:
-
The easiest is to run
dotnet ef database dropand thendotnet ef database updateon their machines. This will drop their existing database and recreate it from scratch -
If they have a lot of testing data and don’t want to drop their entire database, they can check out the Git branch
migration-squash-step-1and rundotnet ef database update. This will apply the empty squash migration.They can then check out the
mainbranch and safely rundotnet ef database updatefrom that point forward. Since the EF Core tools will believe that the squash migration was already applied, it will not try to apply it again.
Other approaches to consider
As I mentioned at the beginning of this blog post, my approach may not work for your environment and workflow. If so, I suggest you look at the following blog posts and tools for different approaches that may be more suitable.
- How to squash EF Core migrations - by Mikael Eliasson
- Seamless Migration Squashing for EF Core 6 Migration Bundles - by Jeff Chen
- Resetting all migrations - from the EF Core docs.
- StewardEF - a .NET global tool that will squash existing migrations into a single migration by combining the code from the existing migrations